Painting Khaki with Andrea Miniatures Paints

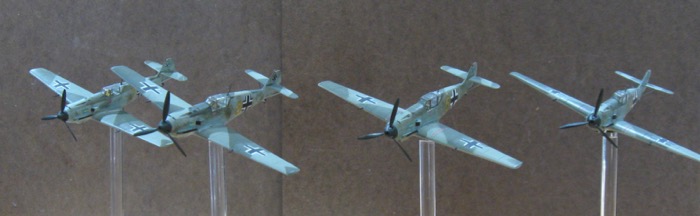
I’m painting up a bunch of Soviet 1/35 infantry from Tamiya and using a variety of Khaki colors for them. I am using Andrea Miniatures Paints and want to both put in a plug for them and share some info that I hope you find helpful. I had their Khaki paint set already. It comes with two different palettes of three colors each. Three I would call yellowish green and three I would call pale brown. The lightest of the yellow greens is what I wanted to use as a base coat for some of the figures but thought the others all too dark. I was curious about the Afrika Korps paint set which has two different palettes of three colors each. I hoped they would not be duplicates of colors in the Khaki set and they aren’t. And I wanted to share the colors I intend to use so hopefully you can see the differences.

From left to right is the Arika Korps Base B, Light B (these are part of what I’d call the sand triad), the Khaki Light A (lightest of the yellowish green), and Light B (lightest of the brown). The other Afrika Korps triad is an olive green color. I thought the Light B would be perfect for the cape as a base. Here is a slightly closer pic. (Yeah, the more I photograph the more I realize it’s time for a real camera….)

Why Andrea Miniatures? There is a bit of a story here. I think I’ve raved in the past about some of their paints, especially their blue set. I have used the black, white, and red also. All nice sets. Earlier this year, I found out I was using them wrong. I was interested in painting splinter pattern camo on Wehrmacht figures and came across this video from Dave Yonquist of Last Cavalry on how he paints them:

(I am not affiliated with Last Cavalry but had really excellent service when buying Andrea paints from them.). The interesting thing about his technique is how thin he puts the paints on. Amazing, and as he says in the comments he things them right down to a kind of filter consistency using nothing but water. I kind of couldn’t believe it but went and tried it for myself. The paints are amazing. I just kept adding water and they didn’t disintegrate but just got thinner down to a kind of filter consistency. So I’ve been doing a lot of different things with my Andrea paints as a result of learning this. (I tried it on some other popular acrylics without similar results. Many of those are disintegrated already when they come out of the bottle….).

Doing this reminded me of another video I had seen and kind of didn’t believe. Julian Conde did a blog of painting with Andrea paints where he airbrushed them onto a figure. I guffawed and forgot about it. I’ve never been able to airbrush acrylics of any sort and thought the dense pigment in Andrea would make it impossible to use them. So I took my thinned Andrea and poured it into my airbrush and the results were … not good. But I didn’t give up and went back to look at his blog:

https://michtoy-from-the-front.blogspot.com/2019/04/mtsc-trench-runner-dispatch-julian_22.html

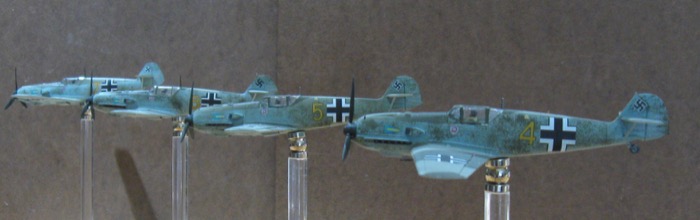
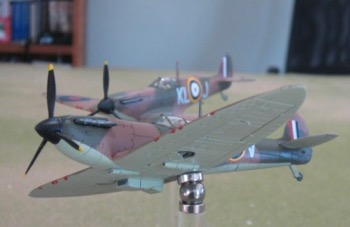
There was obviously something I was missing. A little bit later I came across a post from him on a forum I visit and reached out. He responded very kindly and suggested I add some airbrush thinner and some slow-mo retarder from VMS to my mix for the airbrush. I tried that and after a bit of trial and error I think I have enough of the hang of it to start painting figures with Andrea miniatures acrylics through the airbrush! I did the above 4 that way in one session with no clogged airbrush. This is pretty amazing to me. The mix is roughly 1/4 paint, 1/3 water, 1/3 Vallejo airbrush thinner, 1/12 slow-mo retarder. Now I am just getting the hang of it so I say roughly. I had more or less paint in the various mixes just due to my imprecise measuring and it all came out well if a little different in consistency. That mix is very thin and I had to run about three coats to get a nice opaque finish but they look fantastic.

So shout out to Dave Yonquist and Julian Conde. I’ll be phasing out other acrylics I use as I add to my Andrea paints collection.

303 Squadron Hurricanes for Battle of Britain

I don’t know how long the pre-order for the Airfix Blood Red Skies module has been up (https://www.airfix.com/us-en/shop/new-for-2020/airfix-blood-red-skies.html – I have no affiliation with Airfix, just like the game from Warlord), but seeing it reminded me that I don’t think I’ve posted the 3 Hurricanes I have for the Battle of Britain yet. So here they are:

The models are Airfix Hurricanes. I like the kit quite a bit, but it’s not as nice as the Airfix Spitfire. The decals are aftermarket. They are nice, but incredible thin and so somewhat difficult to work with. I believe I put the magnets a little too far back under these models as they are prone to going into a dive. They will stay in place like this, but they can easily tilt forward. I’ll fix that on the next batch.

Somewhere RF F lost its tail wheel, which was already a replacement. Grrrr.

I have 3 more Hurricanes in the box. I also have another pair of 109s that are ready for paint. I ought to get those done.

1/72 in perspective

When I first started doing 1/72 planes for gaming I had in mind Great War.  My first couple of attempts were a failure.  I’m back at it with a Nieuport 17.  It’s a cute little kit, with the operative word being little.  Those were seriously tiny planes.  At the same time I’m working on a 1/72 F-4 phantom.  I’m amusing myself with some size comparison photos.  The Nieuport compared to just the nose and cockpit of the F-4:

nieuportphantom1

It’s not much bigger if you turn it to take in the lower wingspan:

nieuportphantom2

Then to fully get the size comparison, I’ve laid the rest of the phantom down:

nieuportphantom3

The Pool Deepens

Now a very late war IS-2.  I did not paint it with the Berlin stripes.  This is a very fine model, went together well, and being almost entirely just green was pretty easy to paint.  I’ll probably dust it up a little bit.  It’s by JTFM again.

IMG_4890

IMG_4891


Soviet Vehicle Pool

Added a couple of JTFM Uralmash T-34s to my Soviet vehicle pool.  These are the finest sculpts of 28mm or 1/56 vehicles I know.  But I have a lot of problems getting paint to stick to the resin.   This time I tried Stynylrez primer as I heard such good things about it.  Well, it didn’t really stick at all.  So I rewashed them with alcohol and applied Mr Surfacer well thinned.  It seemed to work ok.  Anyway, I’m pretty pleased with the way they came out.  I have a JTFM IS-2 almost done and I’ll post pics of it here soon.

fullsizeoutput_59

fullsizeoutput_5a

I’m eager to get back to playing some Chain of Command games.


Napoleonic Russians

Someone on LAF was asking about Old Glory Napoleonics.  I commented that I had both Old Glory and Front Rank in my collection and was pleased with both.  He asked for pics, so here they are.  I would not mix the figures in the same unit, but I very much like the Old Glory Russians and are happy to have battalions of them in my army.  I did not paint any of these.  A friend of mine painted the Old Glory figs and hired someone to paint the Front Rank figs.  I think they both look great!

Here is a battalion of line (Old Glory) and a battalion of jagers (Front Rank) side-by-side.

And here are respective stands from each battalion.


JG 2 Schwarm

These have been almost done for the longest time.  I finished them up this evening.  These four planes are from JG 2 Richtofen, more specifically the 3rd squadron.

jg52-4

The two models on the right are Airfix kits.  The two on the left are Tamiya kits.  I did the first couple of Airfix kits and struggled with a lot of fit issues, so tried a Tamiya kit and it fulfilled the Tamiya reputation of excellent engineering and went together like a dream.  So the rest of my 109s are the Tamiya kit.  In addition, the Tamiya kit comes with a bomb attachment which I make use of in the ErPro 210 schwarm I am working on.

jg52-3

These all have unit insignia from the Tamiya kit decals.  The crosses come from Airfix models are from the Airfix kits.  The Airfix decals go on much nicer.  The numbers are from a set of Printscale decals for JG 52.  Those decals are the best of all.  The Tamiya kits come with tail swastikas, which I used.  I got a separate sheet of them initially because the Airfix kits don’t come with them.

jg52-2

These all have magnets underneath and are mounted again on my custom made stands for Blood Red Skies.

Some day perhaps I’ll figure out how to do decent photographs.

One more thing on the subject of kits.  The Tamiya 109 kit really is a dream – the only issue is that there is a piece of plastic behind the instrument panel that needs to be trimmed to allow the instrument panel to fit flush.  It hardly matters with the canopy closed up as you can barely see it anyway.  I put the instrument panel decals on the first few but on the rest of them and going forward I am just painting the relevant instruments by dry-brushing them silver (which picks up the outline of the dial) and the bit of white.  I just looked at the decal and painted the relevant bits.  It’s a lot easier than applying the decal and it’s barely visible anyway.   The airfix kit comes with a pilot which is nice.   For the Tamiya 109s I sourced some resin pilots that were fine, but not great.  They were nice sculpts but very fragile.  I raided another kit for some more plastic pilots.  I haven’t figured out what to do long term.  I wish someone made a box of plastic luftwaffe pilots.

While I’m on the subject of kits and comparing Airfix and Tamiya, I’ll refer back to my post on the Spitfires.  The Airfix Spitfire kit is wonderful.  I had a lot of fit issues on the first one I put together.  On the second I examined it closer to see why things were not lining up and realized that the locating pins/holes are not aligned correctly for the fuselage, so I clipped all the locating pins on the fuselage and the alignment became perfectly (although you have to line it up by hand and eye).  I have purchased Airfix kits for 6 Hurricanes and completed one.  It is fine, but I was sorely tempted to just do 6 more Spitfires I enjoyed that kit so much.

I’ll do a separate post on decals.

Ground support

When I started working on 1/72 planes for the Battle of Britain, I saw the Academy P-47 bubbletop kit and had to have it.  I bought it, built it and the kit was a dream to put together.  But the decals silvered up something awful and it doesn’t look that great as a result.    So I bought another one.  Second copy of the same kit didn’t go together as well as the first, but it was fine, just more sanding and filling, and not much at that really.  But this time I used after market decals from Barracudacals.  This was an awesome set of decals.  They went on like a dream.

Anyway, I still need to add the prop.  It’s done and I was about to stick it on when I realized I still need to do and add the tailwheel and the antenna.  I don’t want the prop on when I’m doing that in case there is any fiddling required.  But here it is:

p47-1

p47-2

p47-3


1/72 Battle of Britain

I’ve been working on this for awhile, and we managed to have our first game last night.  We both thought it worked great.  We played two games, each completed in under an hour.  Here is the first vic of Spitfires:

spitfires1spitfires2

The Spitfires are completely finished.  I have 4 109s that are almost completely finished.  You can see them coming in this crap photo here:

109scrapphoto

I’ll put up some nicer pics when they are done.

Blood Red Skies is a game from Warlord that has been out awhile.  This year they released an updated version called Air Strike.  The game is played with 1/200 scale aircraft on some plastic stands that come with the game.  I wanted to do it in 1/72 so created some stands that I can put the models on.  In a Wargames Illustrated interview Andy Chambers said they are working on a 1/72 version which should be released soon.  I was very far into making my own stands when I heard this and I’d like to show them off, but if you are interested in gaming this in 1/72, you will probably be able to, with kit from Warlord soon.

I had these bases created:

standpic

standcloseup

The base is 3″ in diameter.  It has pointers on it every 45degrees around the base.  These are used in determining front and rear arcs, for firing and being tailed and side arcs for being fired at with deflection shots.  The front pointer tells you the front of the stand and is used when determining whether you are tailing someone.  The round token marks pilot quality (2 through 5 in Blood Red Skies).  The square cut out on the right is for a microdice.  You don’t need that in the game, but I had it added just in case we need to mark something in the future that isn’t accounted for.

The plane sits on top of the stand on a magnet.  It took me some time to figure out how to get the planes to stay on the top of the stand and be manipulated.  In BRS, a plane is in one of three states.  A plane with advantage is depicted as climbing, a plane that is at a disadvantage is depicted as diving, and a neutral plane is flying level.  Pilot actions during the game cause this state to change, so you need to be able to manipulate that easily.

I tried a few things that didn’t work then came across this article from K&J Magnetics: Magnetized X-wing mod .  That looked like it would work so I ordered some components and tried it out.  It’s perfect!  A friend of mine made up the flight stands, 3″ high, and the bases.  I ordered 3/8″ magnets, north and south magnetized, and 3/8″ unmagnetized steel balls.  You can see the whole assembly here:

spitfirebanking

I glued the north magnets on the sticks with CA glue and the south magnets on the bottom of the plane with CA glue.  The ball just sits in between.  I didn’t take pictures showing how powerful these are, but it takes a bit of pulling to get the plane off.  I have held the whole thing upside down and nothing has moved.  Now it’s easy to swivel them on the ball to make them climb or dive of bank or whatever, but it will take quite a bit of effort to knock them off.

When I paint the planes, I put a mask with tamiya tape on the bottom of the plane to keep a segment of clean plastic for the glue to stick to.


Vexillations of Legio XVI Flavia Firma

These have been painted for awhile, just got around to finishing the bases.  Two cohorts of Legio XVI Flavia Firma, stationed on the border with Persia.  The complete what I need to field my Romans in Mortem et Gloriam.  Hopefully I can get a game in soonish.

IMG_4782.jpg

Terrible pictures.  I’m not great at photographing miniatures – this time I’m sure it’s because I didn’t add any supplemental light.

IMG_4783.jpg

These figures are by A&A.  I went with the rectangular shields with the shield pattern from Dura Europis.  I have no idea who carried those shields in actuality, but they look good on legionaries.  My other legions all carry oval shields.

IMG_4784.jpg

There are two cohorts of 6 stands each.  I only put three figures on a stand – they fill the stand and look good at that density.

IMG_4785